27. Deploy Project into Windows Server (IIS)#
27.1. Prepare Python env and IIS#
27.1.1. Python Environment Setting#
According to author’s experience,
python 3.9.xis not compatible withFastCGI, therefore we need to re-create a conda env withpython==3.8And then, we need reinstall the required library, in a case you do not generate
requirements.txt, we do it one by one herewfastcgiprovides a bridge between IIS and Python using WSGI and FastCGIconda create -n py38 python==3.8 conda activate py38 pip install django pip install django-allauth pip install django-crispy-forms pip install crispy-bootstrap4 pip install jwt pip install et-xmlfile pip install requests pip install urllib3 pip install wfastcgi pip install pillow
27.1.2. Django Project Setting#
Remember to change Debug model to
Falseand add Host IP into yourdjango_project.settings.pySet
STATIC_URL,STATIC_ROOT,MEDIA_URL,MEDIA_ROOTDon’t put any static files in the
STATIC_ROOTdirectory. That’s where the static files get copied to automatically after you runcollectstatic.Instead, always put them in the directories associated with the
STATICFILES_DIRSsetting or<APP_NAME>/static/.#django_project.settings.py ... DEBUG = False ALLOWED_HOSTS = ['*'] ... STATIC_URL = "static/" MEDIA_URL = '/media/' STATIC_ROOT = os.path.join(BASE_DIR,'static') MEDIA_ROOT = os.path.join(BASE_DIR,'media') ...
27.1.3. Install IIS#
Search Turn Windows features on or off, check
Internet Information ServicesandInternet Information Services Hostable Web CoreGoto
Internet Information Services>World Wide Web Services>Application Development Features, CheckCGI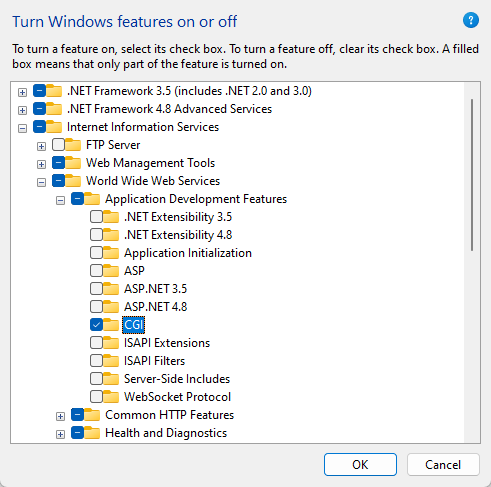
Click
OKto apply this setting, and restart your machine to activate it.
27.1.4. Verify the IIS Installation#
Open a web browser on the server, goto http://localhost/.You should see the default IIS page.

27.2. Configure IIS#
27.2.1. Option 1: Configure FastCGI using IIS#
Click on the name of the server in the list on the left. Double-click the
FastCGI Settingsicon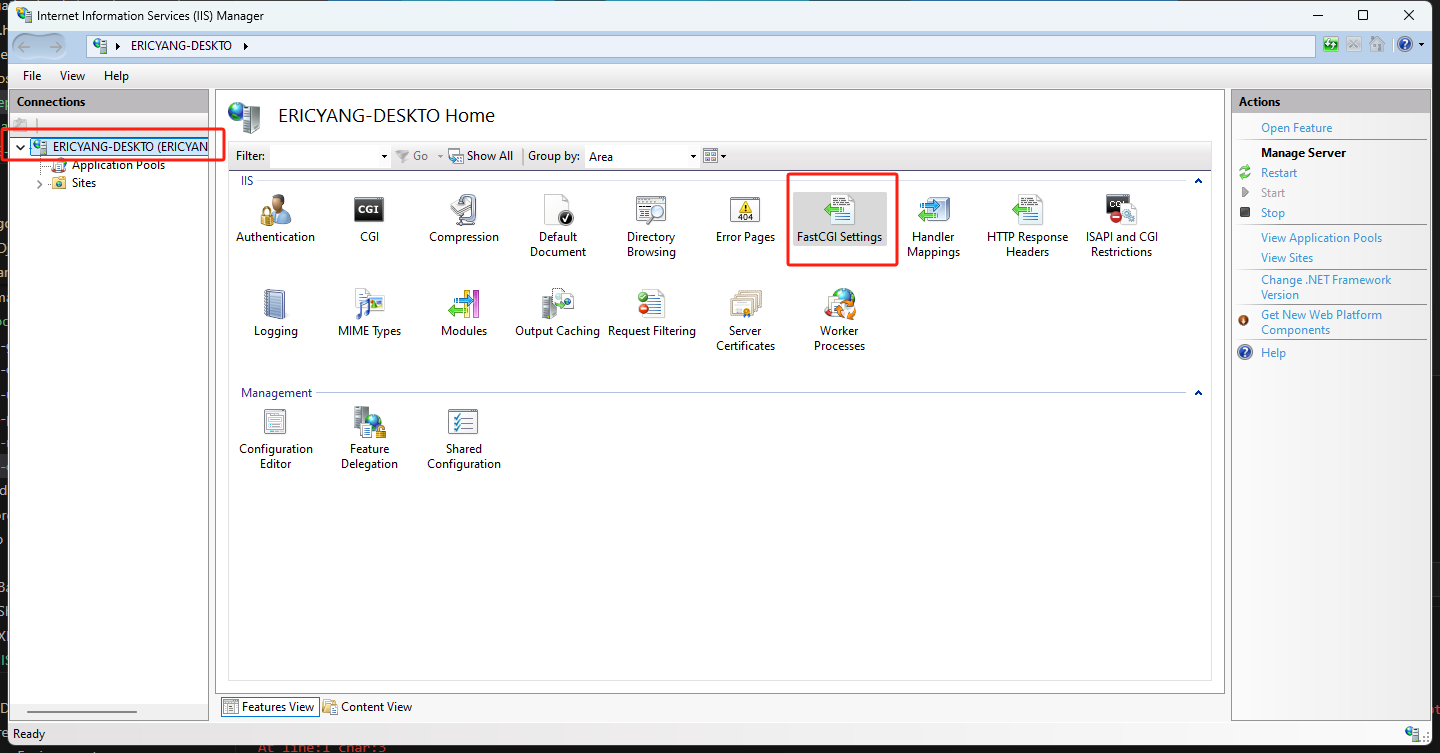
Under
Actionson the right-hand side clickAdd application …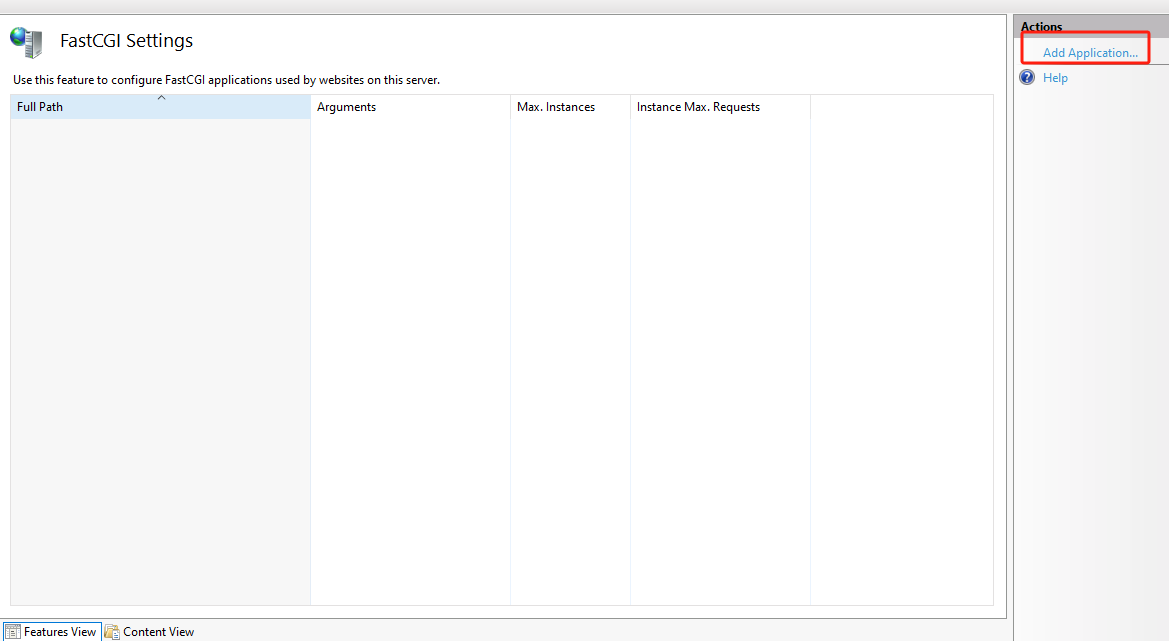
In the Add FastCGI Application dialog, in the
Full Pathbox, type the path to the Python env we just created, and In theArgumentsinput box, type the path to thewfastcgi.pyfile in thesite-packages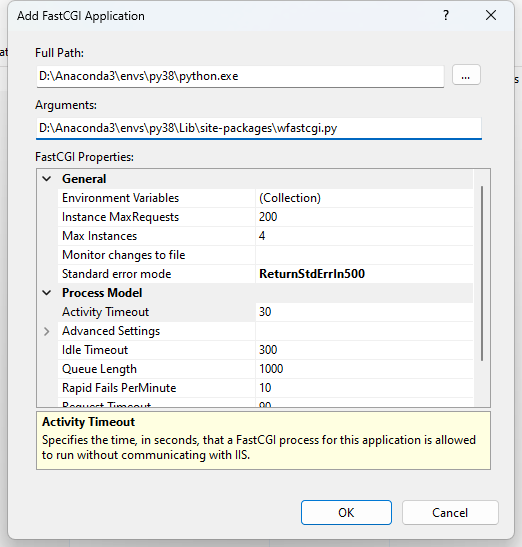
Under the
Generalsection, click on theEnvironment Variablesline, then click the gray…button that appears next to (Collection) on the right-hand side of the line.Add
DJANGO_SETTINGS_MODULEwith value{Your_Django_Project_name}.settingsAdd
PYTHONPATHwith value{Your_Django_Project_Path}Add
WSGI_HANDLERwith value{Your_Django_Project_name}.wsgi.application
27.3. Create and Configure a New IIS Web Site#
Next, we need to create a new website in IIS for the Django application and add a Handler Mapping to the newly created website so that requests coming to the IIS website are passed off to the Django application for processing.
27.3.1. Create a new Web Site#
Open
IIS Manager, Right-click on theSitesfolder and clickAdd Website …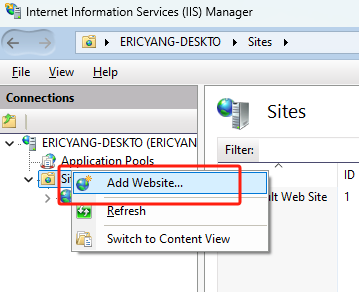
For the
site, name the project as you want. For thephysical path, type the path to the project. ClickOK.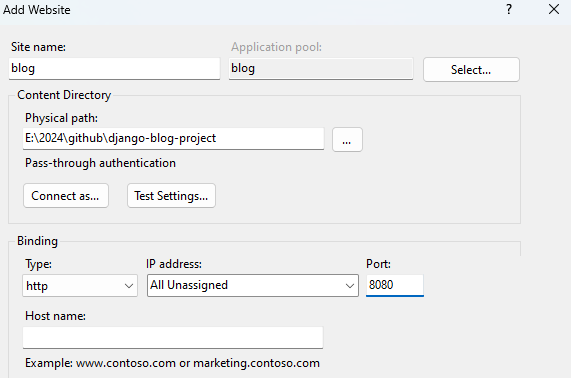
27.3.2. Option 1: Set FastCGI Handler using IIS#
Next, we’ll add a FastCGI handler mapping to this site so the requests coming into the site will be processed by the Django application.
In
IIS Manager, expand the Sites folder on the left-hand side and click on thesite. On the right, double-clickHandler Mappings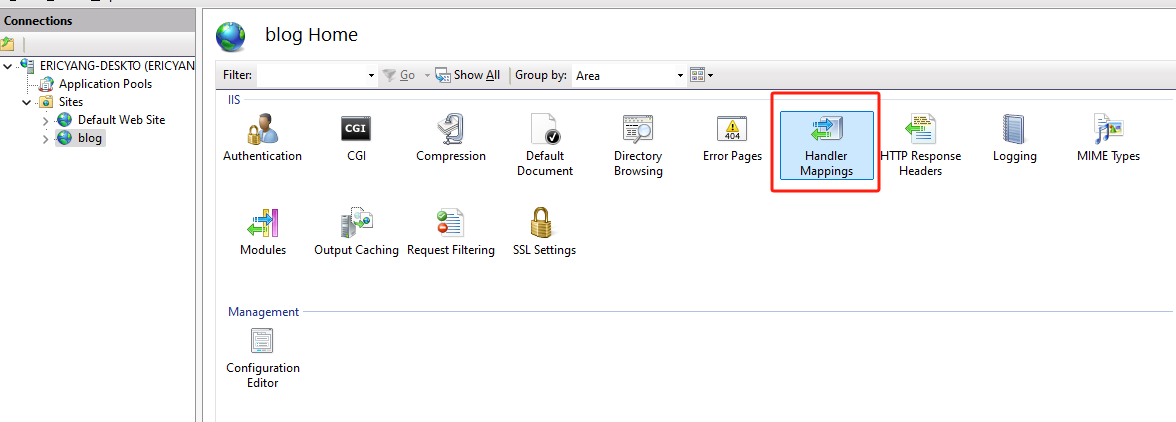
On the right, under
Actions,clickAdd Module Mapping
Fill out the form using your data
D:\Anaconda3\envs\py38\python.exe|D:\Anaconda3\envs\py38\Lib\site-packages\wfastcgi.py
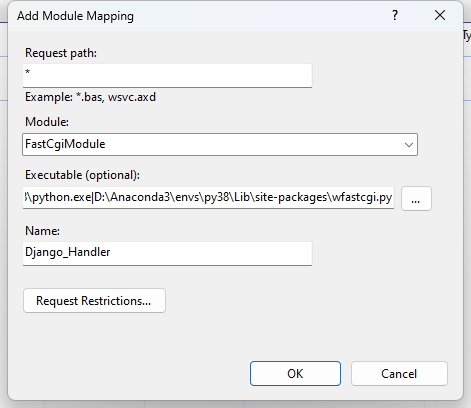
Click the
Request Restrictionsbutton and uncheck theInvoke handler only if the request is mapped tocheckbox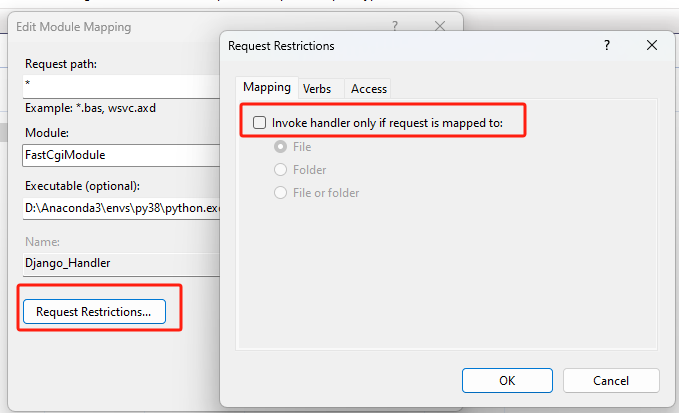
27.3.3. Option 2: Set FastCGI Handler using web.config#
Build a
web.configat under the same dir of{Your Django Project}, below is myweb.configfile<?xml version="1.0" encoding="utf-8"?> <configuration> <system.webServer> <handlers> <add name="Python FastCGI" path="*" verb="*" modules="FastCgiModule" scriptProcessor="D:\Anaconda3\envs\py38\python.exe|D:\Anaconda3\envs\py38\Lib\site-packages\wfastcgi.py" resourceType="Unspecified" requireAccess="Script" /> </handlers> </system.webServer> <appSettings> <add key="WSGI_HANDLER" value="django.core.wsgi.get_wsgi_application()" /> <add key="DJANGO_SETTINGS_MODULE" value="django_project.settings" /> <add key="PYTHONPATH" value="E:\2024\github\django-blog-project\django_project" /> </appSettings> </configuration>
27.4. Load Static and Media file properly#
27.4.1. Gather all static files and make a static virtual path#
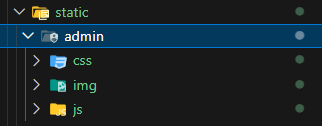
run
python manage.py collectstaticunder your django projectIt will generate
adminunder yourstaticpath, which contains all static files
Add Virtual Directoryin your site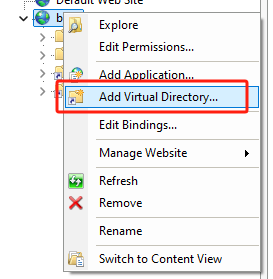
Fill the form using your
staticinfo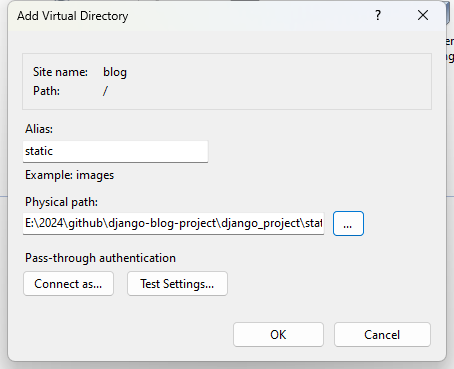
Put a
web.configunder yourstaticfolder<?xml version="1.0" encoding="UTF-8"?> <configuration> <system.webServer> <handlers> <clear /> <add name="StaticFile" path="*" verb="*" modules="StaticFileModule" resourceType="File" requireAccess="Read" /> </handlers> </system.webServer> </configuration>
27.4.2. Do the same for media#
27.5. Check Result and Set Firewall#
27.5.1. Check Result#
At this point everything should be working, so verify by loading the application in a browser.
Open a browser on the server, Browse to
http://localhost:{port number you set}
27.5.2. Configure the Windows Firewall#
27.6. Possible Error#
27.6.1. Python env issue#
Error occurred while reading WSGI handler:

Traceback (most recent call last):
  ...
  File "D:\Anaconda3\envs\py38\lib\site-packages\django\apps\registry.py", line 83, in populate
    raise RuntimeError("populate() isn't reentrant")
RuntimeError: populate() isn't reentrant


StdOut:

StdErr:
open
django/apps/registry.py, and around line 80, replace:raise RuntimeError("populate() isn't reentrant")withself.app_configs = {}This will allow Django to continue loading, and reveal the actual error.